Thursday, January 17, 2013

3 cheese alfredo pasta with shrimp

It's been a while since I posted a food blog, but I just made an awesome dinner from scratch using only ingredients that I already had in my kitchen (a rarity for me) so I thought I'd share.

First, the inspiration:

  • Becca went on vacation and left some Gorgonzola up for grabs. Yummm Gorgonzola...
  • I had a really nice Asiago cheese with rosemary and olive oil from Trader Joe's that I purchased for no particular reason other than it looked delicious 
  • I had a pack of frozen baby shrimp that I got at Albertson's for a dollar. A DOLLAR!
  • I had some leftover shredded Parmesan from something else I made last week.
Becca also left some Alfredo sauce, so I originally thought I'd just borrow some of that and make a shrimp Alfredo and add a bit of cheese. And then I realized, "hey, I have all this really nice cheese! Why ruin it by throwing it into some store-bought Alfredo?" So I made my own!


Ingredients: (word of caution: I threw this together so amounts of cheese and spices are somewhat of an estimation. Sorry! I'll actually record them next time. Also it only makes about 2 servings so double it if you're feeding a family)

2 tablespoons flour
2 tablespoons butter
1 cup milk
3 tablespoons shredded Asiago cheese
3 tablespoons Gorgonzola cheese
1/4 cup Parmesan cheese
1 tsp garlic powder
1 tsp Italian herb seasoning (could sub oregano)
pinch of salt
2 cups cooked noodles (I used spaghetti because that's what I had on hand)
1 cup cooked shrimp (could use chicken or other meat)

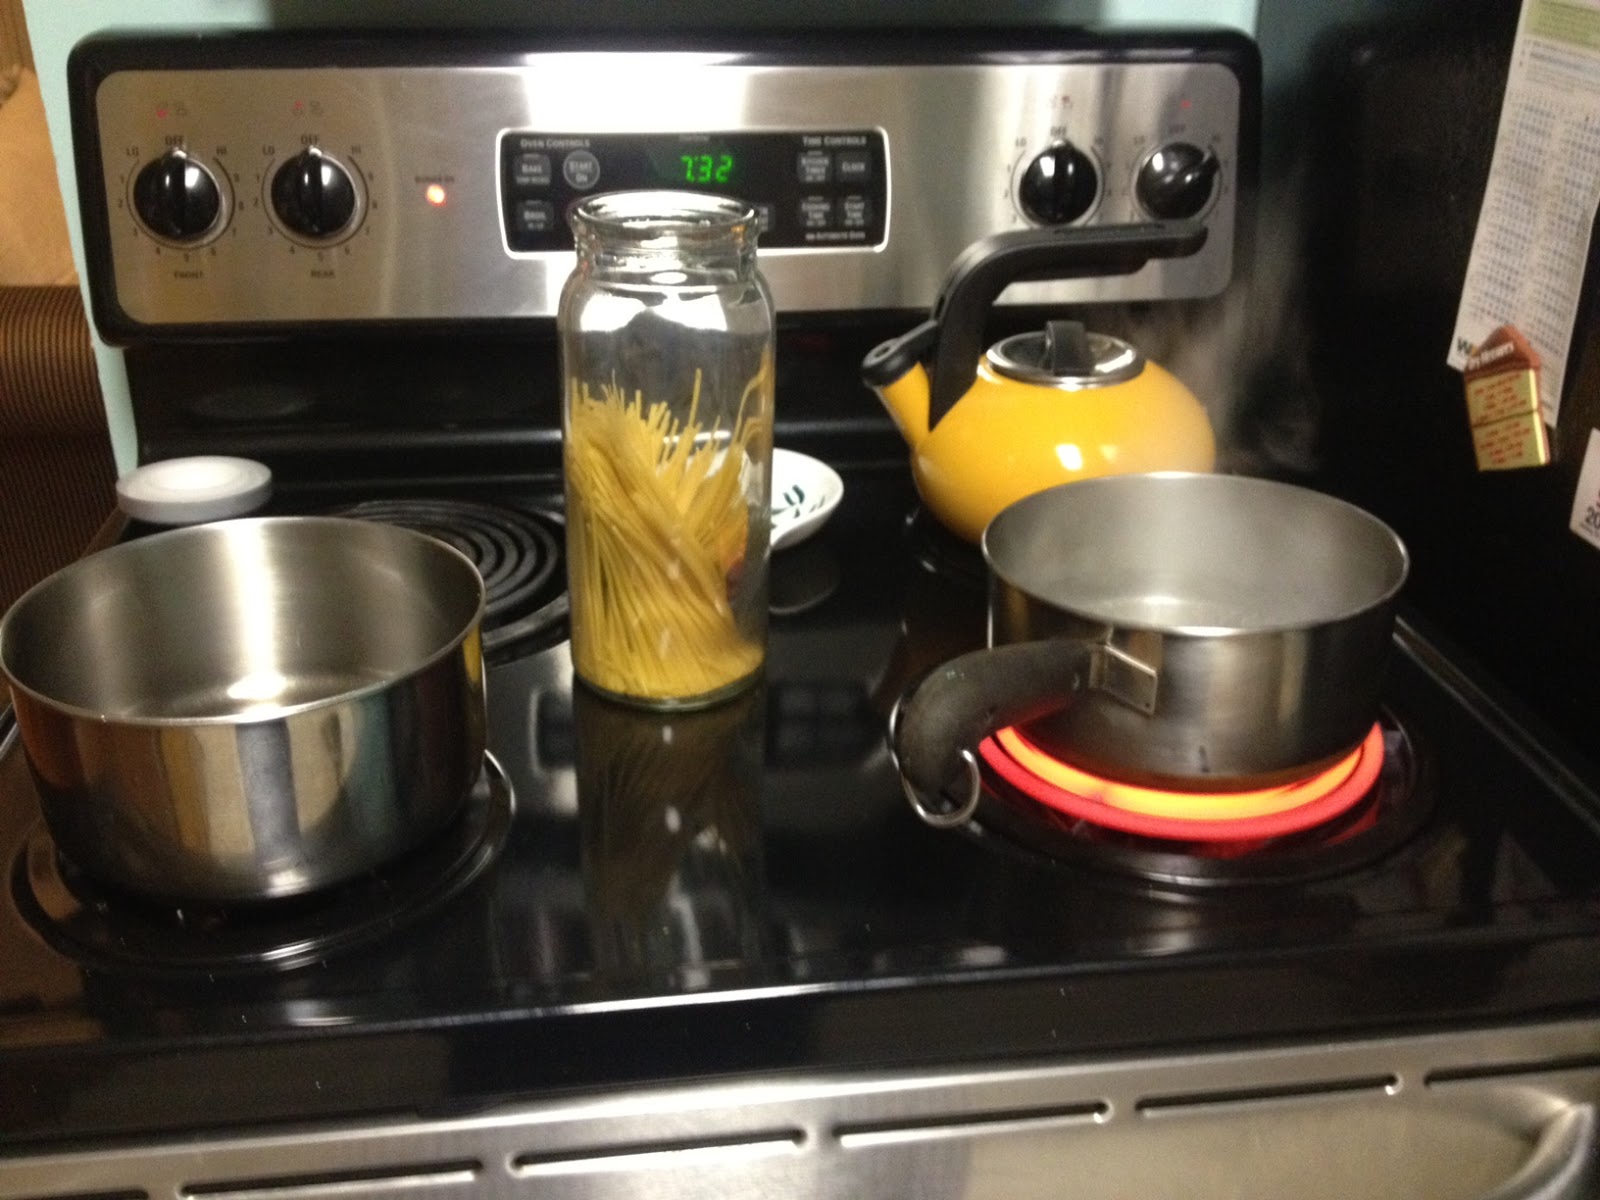
Cook noodles according to package directions. Set aside and keep warm.
Melt butter in small sauce pan over medium heat. Whisk in flour until blended. Whisk in milk and keep whisking until thick. Add cheeses and stir until melted and slightly bubbly. Add spices. Add shrimp and keep on low heat until heated through.

Pour shrimpy sauce over noodles and top with extra Parmesan if needed.

Super easy and yummy!


Thursday, May 24, 2012

crockpot chicken curry, cucumber salad, stuffed date appetizer

My boss brought dates to the office. I ate one and it was good, but I couldn't help thinking that it would be better stuffed with goat cheese and wrapped in bacon.  What does that have to do with curry? Well...

I posted this to my facebook


And received these responses...


Feeling thus affirmed in my desire to eat bacon-wrapped dates for dinner, I decided to do it soon. Then my mom called to say that she and my dad wanted to come visit on Saturday. And so, I hatched a daring plot to make a full dinner with bacon-wrapped dates as only an appetizer. The result:


Dates, stuffed with goat cheese, wrapped in bacon

Ingredients
  • Some dates
  • Chevre with herbs (you could use any goat cheese, and you could use plain goat cheese and add the herbs yourself)
  • Pre-cooked bacon (you could use uncooked bacon, you would just need to be more finicky about your cooking times than I was)
Select as many dates as you want to make. Use a knife to make a slit in the top of each and pull out the pits. Stuff with a generous spoonful of cheese. Wrap each date with half a strip of bacon and secure with a toothpick. Place on a cookie sheet and bacon on 450 for about 5 minutes or until bacon is crispy but not burned. Serve hot
 

Crock pot curry (adapted from a Real Simple recipe)

This is really easy to make and inexpensive, but the secret is having a good Indian spice blend. I used vindaloo that I bought here. The original recipe called for garam masala. I'm not sure if they often have this type of spice in the regular grocery store (I haven't looked).

Ingredients
  • 14-ounce can diced tomatoes
  • medium onion, chopped
  • 3 cloves garlic, chopped
  • 2 tablespoons tomato paste
  • 2 teaspoons vindaloo or other Indian spice
  • 1/2 teaspoon salt and dash of pepper
  • 3 good-sized boneless chicken breasts. Mine were frozen and worked great
  • 1/2 cup cream or coconut milk
Dump all ingredients except the cream into crock pot. Cook on low for about 8 hours. Add cream before serving

Cucumber salad

Chop up one small cucumber. Add a couple tablespoons of chopped fresh cilantro. Toss in 1 tablespoon lemon juice and season to taste with salt and pepper. 


Serve the curry over rice, or naan with the salad on the side (the flavors blend nicely together). The bacon-wrapped dates are more of an anomaly but still good.

Thursday, May 10, 2012

Easy, cheesy, veggie quiche

Quiche is a lot easier to make than I thought! I will make this again someday with bacon or something.

Frozen ready-to-bake pie crust
1/2 cup chopped red onion
1/4 cup chopped red bell pepper
1/4 cup chopped yellow bell pepper
1 zucchini, cut into bite-sized pieces
1 or 2 tablespoons olive oil
2 large eggs
4 1/2 fluid ounces cream
1/2 cup grated swiss cheese
1/2 cup grated cheddar cheese
1 tsp dried basil
Salt and pepper

Preheat oven to 400F

Toss vegetables in oil and bake put on a cookie sheet. Roast for 25 minutes or until slightly charred.

Reduce oven temperature to 350F

Combine cheddar and swiss cheese. Set aside 1/4 cup. Whisk eggs and cream. Whisk in 3/4 cup cheese, basil, salt and pepper to taste.

Add vegetables to pie crust and pour over the egg mixture. Sprinkle the rest of the cheese on top. 

Bake for 35 minutes. 

Tipsy Banana Bread

The original recipe was "jacked-up" banana bread. It had bourbon in it. We didn't have any Jack Daniels, so we used rum.  You can't taste the alcohol, but it seems to make it more moist--I figure it's not drunk--just a bit tipsy. I love cold banana bread with butter, but this is tasty enough to eat plain.

3 large (or 4 smaller) ripe bananas, mashed up. Frozen bananas work great because they are already mushy.
1/3 cup melted butter
1 cup brown sugar
1 beaten egg
1 tsp vanilla
1 tablespoon rum
1 tsp baking soda
Pinch of salt
1 tsp cinnamon
1/2 tsp nutmeg
Pinch of ground cloves
1 1/2 cup flour

Preheat the oven to 350. Mix butter and bananas in a big  mixing bowl. Mix in the sugar, egg, vanilla, rum, and spices. Add baking soda and salt. Lastly, mix in the flour. Pour the mixture into a greased loaf pan. Bake for about 50 minutes or until a fork comes out clean.

Toasted Caprese Sandwich with Garlic Basil Mayo

I typically blog when I make a full-fledged recipe. Something fancy, that I had to go out and buy 10 specific ingredients for and involved multiple stages of preparation. Gotta be honest, not my typical night. Since this is now a general food blog and not a cooking blog, I can come clean that a typical dinner for me probably consists of something like:
  • a bean and cheese burrito
  • Tuna and cheese sandwich with tomato soup
  • scrambled eggs and toast
  • makeshift Greek chicken salad
  • Trader Joe's premade pizza
  • Okay...Trader Joe's premade anything...
What I'm driving at here is that few people I know have the time to cook a full-fledged recipe every night, but we still cook by piecing things together. It's not all TV dinners and frozen pizza (although the Trader Joe's version of TV dinners and frozen pizzas are pretty delish...I digress...). And the happy news is that meals that are pieced together can be pretty darn yummy! 

Earlier this week I made bruschetta so when I opened my fridge tonight, I saw that I still had some fresh mozzarella, fresh basil, and cherry tomatoes, so I decided to make a caprese sandwich. Sadly, the crusty bread was all gone, so I just used boring old regular bread. I've made this before with rolls and it was even better, so if copy the recipe, I'd recommend splurging on better bread. But regular bread was fine. 

Ingredients
  • Bread or rolls. It might be good on flatbread too, but I haven't tried that!
  • Tomatoes. (I used cherry, which is not ideal, but I don't believe in grocery store tomatoes unless they are cherry and don't have anything growing in my garden sooooo...)
  • Mozzarella cheese (fresh is best, but regular is fine)
  • Fresh basil (I supposed dried basil would be fine, but fresh is so good!)
  • Mayonnaise
  • Garlic salt, or garlic powder and salt
Instructions (for 2 sandwiches)

1. Toast 4 slices of bread in your toaster (to keep it from getting soggy later)
2. Thinly slice up tomatoes
3. Cut off several thick slices of mozzarella
4. Combine about 2 TBSP Mayo with 4 finely chopped basil leaves (or 1 tsp dried basil) and a teaspoon of garlic salt.  (You might want to taste it and then play around with the quantities)
5. Spread the mayo on two slices of bread and set aside
6. Put the other two slices of bread on a cookie sheet and top with tomatoes and mozzarella
7. Put in the oven and broil for 5-10 minutes, just until cheese is melted. 
8. Top each sandwich with more basil leaves and a mayoed slice of bread.

Voila! 10 minutes dinner.  Forgive the sloppy mayo job in my picture below.


Monday, May 7, 2012

Being beautiful

Awesome article on "skinny bashing," referenced below. I completely agree that beauty is not about size. Really beauty, as cliche as it is, is about what's inside not what's outside. However, if we want to discuss outer beauty, we should be talking about health, not stereotypes. It's not healthy to be obese, OR ridiculously skinny. But there are beautiful, healthy men and women of all shapes and sizes. That's what matters.

Skinny bashing and fat bashing reflect our society's unhealthy, appearance-based, value system. And I think that women perpetuate this MORE than men do. So let's quit it. Stop worrying about ideal sizes and instead enjoy food and exercise for the sake of being healthy, not being skinny. 

http://girliegirlarmy.com/lifestyle/20120120/the-problem-with-skinny-bashing/

Thursday, April 12, 2012

The new and the old

I love food--I find it endlessly fun and interesting. For a while now, I've been toying with the idea of creating a blog that explores life and the world through the lens of food and dining. So--I did it! I migrated my old cooking blog into this one to create an even more extensive dining experience.
Here you will find:
  • Recipes
  • Restaurant reviews
  • Links and useful articles
  • Discussion about food, health, and fitness
  • Occasional boring commentary about what I ate today
  • Anything else I feel like throwing your way

Philosophy of Food: I believe that in food, in health, and in life, all things are good in moderation. I'll eat anything, but I also believe in healthy eating and living. I am hoping the explore these ideas more and further develop my food philosophy, hopefully with lots of great input and discussion from you!

Monday, March 21, 2011

Blueberry Almond Streusel Muffins

Aimee and  I  made a HUGE batch  of these muffins for a church brunch this weekend, and also made several loaves of banana bread (recipe coming soon). We quadrupled this recipe. I don't recommend it unless you are really cooking for a crowd. Quadrupled, it made about 60 muffins! We used frozen blueberries and it turned our muffins blue, which was kinda pretty,  but kinda weird.  It would be better with fresh blueberries, and actually you could use any kind of berry you want. Enjoy.

Streusel
1/2 cup flour
1/2 cup brown sugar
1/4 cup butter, softened
Muffins
2 cups flour
2/3 cup sugar
2 teaspoons baking powder
1/2 teaspoon baking soda
1/4 teaspoon salt
2 large eggs
1 cup buttermilk
1 teaspoon almond extract
1/2 cup butter, melted
1 1/2 cups fresh berries


Preheat the oven to 400ºF. 


Mix the streusel ingredients until crumbly.  I washed my hands and used my fingers, since it was easier to mix in the butter that way. Set aside. 
 
In a large bowl, whisk together the dry ingredients (flour, sugar, baking powder, baking soda, and salt.)  In another bowl, whisk  the wet ingredients (eggs, buttermilk, almond extract and melted butter).

Stir the wet ingredients into the dry ingredients with a wooden spoon until just mixed and moistened.  Don't overmix, the mixture is supposed to be lumpy. Gently mix in the berries.


Line your muffin tin with paper muffin liners and fill about 3/4 full with batter  Top with the streusel topping. Bake for about 20 minutes, or until a toothpick or fork comes out clean. 


Sunday, March 20, 2011

Garlic and More Garlic Cold Quinoa Salad

As the name of this recipe suggests, it is very garlicky -- so if you don't like garlic, I suggest you don't bother with this recipe. I happen to looooove garlic, so it works for me quite well! Cold quinoa salads are great because you can throw in whatever vegetables you have on hand (I've made this with broccoli and red onion before). You could also use different types of cheese. The original recipe called for goat cheese, but I always have sharp cheddar, so I just used that and it was good.

Rant on grocery store tomatoes: I've decided that it's pretty much not worth buying tomatoes at the grocery store unless you buy cherry or grape. Unless maybe you have a really fancy grocery store with especially good tomatoes, in which case, buy a big tomato and chop it up for this recipe. If you grow your own or have access to a farmer's market, even better! Okay, end rant on grocery store tomatoes.

This makes about 4 servings--more, if you're making it as a small side dish. I like to make a big batch and have it for lunch several days during the week.

(Sidenote on the dressing: The original recipe called for 1/2 a cup balsamic vinegar, but that is just a lot of vinegar, so I use less. You may need to tweak some of the amounts on the dressing depending on how big your salad ends up being (if you add vegetables) and how strong you want the flavors. I suggest pouring on part of the dressing, tasting it, and then pouring on more if you want more flavor. Balsamic vinegar plus a ton of garlic gives it quite a kick.)


Salad
½ tsp crushed red pepper
1 cup uncooked quinoa, rinsed
2 cups vegetable broth (to cook quinoa--can use 2 cups water instead)
2/3 cup spinach leaves, chopped
1 cup grape or cherry tomatoes, halved
3/4 cup cubed sharp cheddar cheese
1/4 cup shaved Parmesan cheese


Dressing
2 heads of roasted garlic
2 T olive oil (for roasting garlic)
1/3 cup balsamic vinegar
1T Dijon mustard
4 cloves of garlic, minced
1/3 cup olive oil
pinch of salt
pinch of pepper


  1. Preheat the oven to 350 degrees.  Remove the papery part of the garlic and cut top off the head.  Break into separate cloves.  Toss with olive oil and wrap in foil, and bake for one hour.  Cool and squeeze out garlic pulp. Mash with a fork. 
  2. Bring vegetable broth to a boil.  Add quinoa and crushed red pepper and boil for 15 minutes.  Drain in a fine colander and put in refrigerator to cool.
  3. While quinoa is cooking, combine spinach, tomato, and cheeses in a large bowl.  Toss gently.
  4. Make dressing by combining vinegar, mustard, garlic and roasted garlic in a bowl. Mix well with a fork.  Add in olive oil in a fine stream.
  5. When quinoa is cool, add to the spinach and cheese mixture.  Add dressing and toss.


Monday, February 28, 2011

Garlic Hummus

Another recipe inspired by Caitlin. For people who don't eat a lot of meat, chickpeas and tahini are both good sources of protein, and hummus has them both.  This makes a big batch, but if you don't want a lot, you could easily make half.

Ingredients:

2 cans garbanzo beans (chickpeas), 1/2 the liquid reserved
4 (large) cloves garlic
8 TBSP lemon juice
4 TBSP tahini
1/2 tsp salt
1/2 tsp pepper
1 tsp cumin

Notes:

You'll need a blender or a food processor. I've made hummus in my blender and it was fine though it doesn't get as smooth. However, my blender wasn't very happy with me for doing it, so I recommend a food processor. This is mine, which is both really old and brand new, depending on how you look at it.


(Brand new to me. Really old because in actually years, it's older than I am. But it's only been used 4 times according to my mom. It's a beast. Definitely got the job done.)


Tahini is sesame paste. It might be hard to fine. I found some at Safeway with the peanut butter. You could try a middle eastern grocery store or something if you can't find it. You can also totally make hummus without it. I don't think it tastes quite right, but some people don't like tahini anyway.


To make

Peel garlic and throw into blender or food processor (you might need to coarsely chop first, depending on your blender). Drain garbanzo beans and reserve the liquid from one can. Add chickpeas to food processor and blend with garlic. Add the rest of the ingredients and blend some more. Add the reserved bean liquid in increments until hummus reaches desired consistency. When you serve, you can garnish with some olive oil and a sprig of parsely if desired.


Serve with vegetables, crackers, pita chips, or pita!

Vegetarian Crockpot Chili

This turned out a little more tomato-y and less spicy than I wanted. If I were going to make it again, I'd use less tomato paste.  I would probaby double the jalapeno. Or use a spicier pepper. Or add more chli powder and some cayenne pepper. Or maybe tabasco. Such possibilities...

Ingredients:

1 TBSP vegetable oil
1 cup chopped onion
1 cup chopped red  bell pepper
3 TBSP minced jalapeno
2 cloves garlic
1 diced tomato
1 can tomato paste
1 can kidney beans drained & rinsed
1 can garbanzo beans, drained
1 can corn
1 tsp sugar
1 tsp cumin
1 tsp dried basil
1 tsp chili powder
1/4 tsp black papper
Cheddar cheese for garnish

Heat oil in a skillet over medium-high heat. Add onion, bell pepper, jalapeno pepper and garlick. Cook about 5 minutes or until tender.

Put vegetables and remaining ingredients (except cheese) into crock pot. Cook on low 4 to 5 hours.


Wednesday, February 23, 2011

Aimee's Buffalo Chicken Mac 'n Cheese

Now that I've made it for my family, it will become "Megan's Buffalo Chicken Mac 'n Cheese" for them.  Funny how recipes work like that. Originally, this is Anna's recipe (a food blogger that Aimee likes).

And since I basically didn't alter this recipe much at all, I will just link to the original blog. Although I will post pictures of MY finished product, which was tasty.

This is great if you like ultra-cheese, creamy, unhealthy goodness with a buffalo kick. 

http://www.sweetannas.com/2010/04/baked-buffalo-chicken-mac-and-cheese.html


Tuesday, February 15, 2011

My First Cheese Souffle

Aimee (my roommate) made cheese souffle for dinner the other night. I didn't actually eat it. I didn't actually see it. But the idea of it inspired me. All you really need is cheese, milk, and eggs. Okay and a few other things. And to be technical, I only made 1/2 of a cheese souffle and I ate the whole thing. It was THAT good. Here is the full (non half) recipe, but my slightly modified version (pretty close to the real version except that it called for cream of tartar. And who just HAS that on hand?)

Ingredients
Butter, room temperature, for greasing the souffle
2 tablespoons grated Parmesan
3 tablespoons butter
3 tablespoons flour
1 teaspoon dry mustard
1/2 teaspoon garlic powder
1/8 teaspoon kosher salt
1 1/3 cups milk, hot
4 large egg yolks
About 1 cup sharp Cheddar
5 egg whites plus 1 tablespoon water

Digression: recipies never tell you the REAL order you should do things in. They just assume you do all your prep in advance like on cooking shows and work at lightning speed once you get going. (one Rachael Ray recipe I made said that it would take 30 minutes to prep. It took me 1.5 hours. Lesson: I am NOT Rachael Ray). So I'm going to give you the instructions step-by-step exactly as I did it because there is a bit of complexity here and it worked well for me. I'm not trying to insult your intelligence; I  have just personally made too many mistakes by not reading a full recipe and then realizing halfway through that something is whack. Okay, digression over.

1. Remove butter from refrigerator to bring to room temperature
2. Preheat oven to 375
3. Mix up flour, mustard, garlic powder and salt in a small bowl and set aside.
4. Separate your egg whites into a medium-sized mixing bowl. Save the yolks and put them in another bowl.
5. Beat yolks with a fork until creamy. Add water to egg whites and beat with a hand mixer until fluffy and stiff.
6. Grease an 8-inch souffle mold or casserole dish with a bit of your now-room-temperature butter. Add the grated Parmesan and roll around the mold to cover the sides. Cover with plastic wrap and place into the freezer for 5 minutes.(just keep a general eye on the time because I'M not going to tell you when to take it out)
7. Heat your milk in the microwave (1.5 minutes on high should do it). Put all of your ingredients at hand near the stove.
8. Melt 3 TBSP butter in a small sauce pan on low heat. Allow all of the water to cook out.

9. Whisk the flour mixture into the butter and cook for about 2 minutes, continuing to whisk and scraping the sides of the pan as necessary.
10. Whisk in the hot milk and turn the heat to high. Once it reaches a boil, remove from heat.
11. Whisk in the egg yolks. (keep whisking!).
12. Whisk in the cheese until smooth (yeah, whisk that sucker!)
13. Okay, STOP whisking. Gently fold in the beaten egg whites, one large spoonful at a time.
14. Awesome! Now pour the mixture into your souffle mold (did you remember to take it out of the freezer? You forgot, didn't you? Oh well, it should still work!)
15. Put it on a foil pie pan and bake for 35 minutes.

Voila! Cheese souffle! Okay, I didn't take a picture because I ate it all before I remembered. Oops.
Quinoa stuffed red bell peppers

So I've been lazy. I cook a lot, but I always forget to take pictures. And then I'm too lazy to blog about it. Mea culpa. I'm going to do better.

Thus far, I have kept my New Year's resolution to only buy organic meat--from whole foods or PCC because I trust them more. As a result I have been eating more vegetarian dishes, which has been delicious. My lovely friend Caitlin turned me on to quinoa, which is a miraculous and tasty little grain--a complete protein unto itself! Say it with me: "keen wa." Got it?

Sometime I will share the delicious garlicky quinoa salad recipe that I found. For now, I will just share what I made last night -- red bell peppers stuffed with quinoa. Healthy! Full of veggies! I slighly modified a recipe I found online because I didn't feel like buying celery or mushrooms and I couldn't find poblano peppers so I substituted a jalapeno. Really, you could make this with any number of different kinds of veggies--whatever you happen to have on hand.

Ingredients:
2 TBSP olive oil
1 medium onion
1 jalapeno pepper
1 TBSP cumin
3 cloves garlic
1 can diced tomatoes (drained, liquid reserved)
1 can black beans, rinsed and drained
1/3 cup quinoa
1 1/2 cups grated carrot
1 1/2 cups grated pepper Jack cheese
4 large red bell peppers, halved lenghwise, ribs removed.

Heat oil in large saucepan over medium heat. Add onion and jalapeno and cook about 5 minutes. Add cumin and garlic and saute 1 minute. Stir in drained tomatoes. Cook 5 minutes until most liquid has evaporated.

Stir in quinoa carrots and 1 3/4 cups water. Cover and bring to a boil. Reduce heat to medium-low and simmer 20 minutes, or until quinoa is tender. Add black beans and 1 cup of cheese. Season with salt and pepper.

Preheat oven to 350. Pour liquid from tomatoes in bottom of baking dish.

Fill each pepper half with heaping 3/4 cup quinoa mixture and place in baking dish. Cover with foil and bake 40 minutes. Uncover and sprinkle each pepper iwth 1 TBSP of remaining cheese. Bake 15 minutes more until tops are browned. Let stand 5 minutes. Drizzle peppers with pan juices before serving.


Saturday, July 10, 2010

Vegetarian Lentil Sloppy Joes

I'm way behind on my food blogging! A few weeks ago, Caitlin and I made dinner from one of her vegetarian cookbooks. This dish was called "Snobby Joes" -- "Snobby Joe thinks he's better than all the other Joes because he doesn't have any meat."

Lentils replace the meat in this dish, so we started boiling them while we chopped up one onion, one green bell pepper, and two cloves garlic.
 We sauteed the vegetables in olive oil and then added the cooked lentils, 2 teaspoons oregano, 1 teaspoon salt, and 2 tablespoons chili powder (the recipe called for 3 TBSP chili powder, but we made it a bit less spicy). We then added a can of tomato sauce, 1/4 a cup tomato paste, and cooked a little longer. We threw in a couple tablespoons maple syrup, and a tablespoon yellow mustard. We cooked it a little longer and then it was ready to be served on a bun!

I really didn't miss the meat much in this dish, but if you do, you could pretty much make the same recipe and sub meat for lentils. This makes really good leftovers too.

P.S. We also made yummy mashed potatoes, which you will see pictured here on the plate.

Saturday, June 19, 2010

Don't Cook if You Can't Handle Heat! Spicy Steak, Sweet Potato Salad, & Peanut Butter cookies!

Aimee and I moved about a month ago and we couldn't have done it without help from friends Anton, Rachel, and Ben, so we planned an ambitious thank-you dinner! Aimee made the Double Peanut Butter Chocolate Chip Cookies the night before (with a little help from me)--they turned out great and we've been snacking on them for days. If anyone wants me to post the recipe, I can, but I wasn't greatly involved in their production so I'm not gonna put it here.


We made Chili-Rubbed Sirloins with Guacamole Salsa and Roasted Sweet Potato Salad with Lime and Honey from (of course) the Big Book of Backyard Cooking. As soon as I got home from work, I had to start cooking, so the first thing I did was get the potatoes ready for roasting. Right away, I ran into a minor problem--we'd accidentally bought two different varieties of sweet potatoes. 


A day earlier, we'd had trouble at the store discerning between yams and sweet potatoes, which both seemed to be in the same bin and looked pretty dang similar. When we questioned the difference a fellow shopper asked, "Aren't they the same thing?"
"They're labelled differently," I pointed out. "And have different prices."
She shrugged and we concluded that they were probably pretty similar. I didn't realize the difference until I got the skin off. "Yams" (which I guess is just a colloquial term for orange sweet potatoes?) are bright orange underneath and these are what we were SUPPOSED to buy. "Sweet potatoes," as labeled by Safeway, are white under the skin. If you look closely, you can actually tell through the skin that yams are "oranger," so I guess I learned something new.


Anyway, back to the cooking adventure: since we'd bought two of each, I decided that our salad would just be multi-colored. I chopped the potatoes into 1-inch cubes, threw them on two foil-covered baking sheets, tossed them in olive oil and kosher salt and popped them in the oven on 450 for 20 to 25 minutes (they have to be stirred around once or twice and checked to make sure they don't burn). 


I continued with the slicing and dicing. I chopped up some roma tomatoes, 4 avocadoes, two jalapenos, some red onion (our substitute for shallots) and cilantro. The tomatoes, avocados, and jalapenos went into a bowl together and the cilantro and onion were mixed with some lime juice, cumin and salt and then poured over the tomato mixture. Guacamole salsa, finished! We tasted some and it had quite a bite to it. 


By this time, Aimee had come home and mixed up the lime, honey, and cilantro together for the sweet potato dressing . We poured it on and added salt to taste. Yum. Done! Ben arrived, and we chatted with him as we finished up. It was at this point that four of my fingers started to burn from the jalapeno juice. I ignored it and kept working. 


Aimee rubbed the steaks with a mixture of cumin, chili powder, salt and pepper. Except for Anton's--he doesn't like the the heat. Well at least in his food--he handled it pretty well when a fireball from the BBQ exploded in his face later. We're still not sure what happened. This is after a discussion about how most of us are pyros. Meanwhile, the burn in my fingers intensified and I had to run my hands under cold water. I'd cut jalapenos with my bare hands before and never had this problem. These must have been some pretty intense peppers.


Rachel and Anton arrived. After some internet research, I decided to douse my hand in milk to try to stop the burn from the jalapenos, which I was now denouncing as seriously evil. Anton agreed and felt validated for his dislike of spicy food.


We gave Anton the grilling job and he got the BBQ going with only the minor mishap mentioned before. And some smoke that made the upstairs neighbor come down to make sure that our apartment wasn't on fire. But seriously, we appreciate Anton for getting the grill going! I can't even get it sufficiently lit on my own, even with copious amounts of lighter fluid.


After more internet research, I smothered my burning hand in dish soap and let it sit for a while, which seemed to put the lid on the jalapeno fire. We grilled the steaks to about medium well and served them with the salsa on top. We had a great time eating, drinking wine, and playing games until about 1am. 


The only major problems were Anton's singed eyebrows and my jalapeno burns, which reoccured after cleaning up and kept me awake until 3:30am! EVIL PEPPER. Yummy steak and sweet potatoes. 

Monday, June 14, 2010

Turkey Burgers with White Cheddar and Apple Slices

Janelle and I decided to save money by making dinner instead of going out to eat. She thought turkey burgers sounded good, which was exciting because I knew there was a great recipe (that I had made before) in the The Big Book of Backyard Cooking. The fancy version that the book suggests involves an actual grill, grated apple and diced onion in the meat, chilling the burgers for an hour before grilling, and putting watercress on finished product. But the simple version was delicious enough for me!

Mix about a pound of ground turkey with 1/2 a teaspoon of salt, 1/2 a teaspoon of pepper, and 2 tablespoons honey mustard. Cook until done using your favorite method of cooking meat (we used a George Foreman). Toast your hamburger buns and assemble burgers, garnishing with honey mustard, apple slices, and sharp white cheddar cheese (there's a great Irish cheddar at Trader Joe's that works well for this). We also added avocado because everything tastes better with avocado.


We also wanted sweet potato fries, but they didn't have any frozen ones at the grocery store, so we just bought a sweet potato. These were super easy to make. Peel the potato and slice it up--slice it thinner if you want crispier fries. Put on a baking sheet, sprinkle with salt and pepper and drizzle with olive oil. Bake for fifteen minutes on 450 degrees.

This first blog wasn't terribly exciting because I already knew how to make these (read: nothing went wrong), but stay tuned for more exciting adventures with newer recipes!